
I'd like to share what I know about airbrushes and airbrushing with those who might like to give tackle making a try.
Airbrushing is a way of painting with a spray pattern similar to what you've probably experienced with a can of "spray paint." The airbrush does the same thing, but it affords you a lot more control over where the paint goes and how much of it goes there...and that is all the difference in the world when it comes to how your project will look when complete.
The basics you'll need:
Lets start with the airbrush itself since this is what a lot of guys are most curious about and what a lot of questions focus upon.
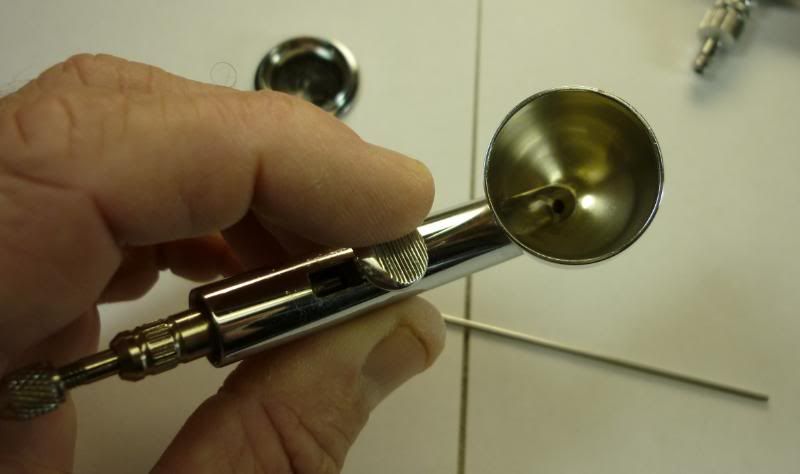
An airbrush is either "gravity fed" or "siphon fed."
Gravity fed airbrushes usually have a cup on top in for the paint. The paint simply flows down through the cup into the airbrush and is blown onto the target surface.
Siphon fed airbrushes have a container which attaches to the bottom of the airbrush and the paint is pulled or "siphoned" out of the container and UP into the airbrush.
Generally siphon fed airbrushes require a little more airpressure because the paint is pulled up instead of being fed downward by gravity. For that reason, many users prefer gravity fed brushes. But siphon fed airbrushes do have their advantages. Some users like the idea that a bottle with paint attaches to the bottom of the brush and when you're ready to change colors, you simply remove the bottle, blow some solvent through the brush, and simply attach another bottle with the new color to the bottom of the airbrush. I prefer the gravity fed, but I've used both. I actually started with a siphon-fed Paasche airbrush.
Go ahead. Pull the trigger.
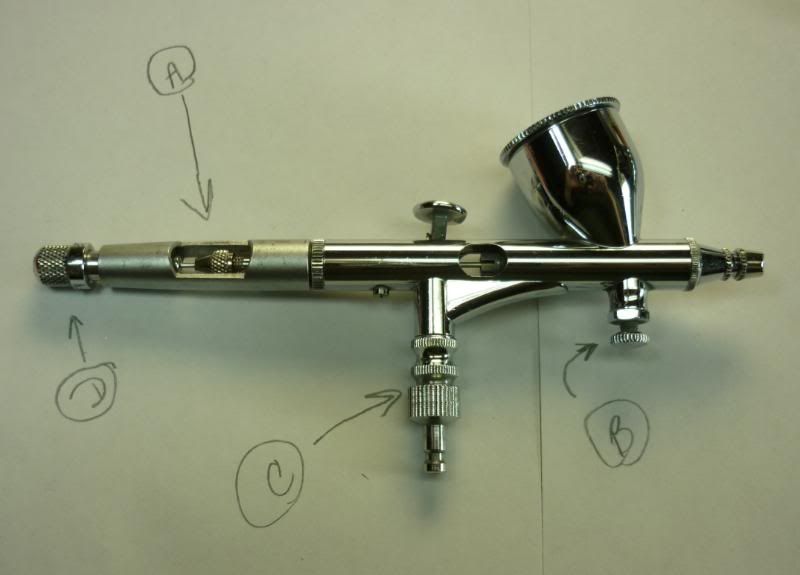
If you've look at airbrushes, you've noticed they have a trigger on top that you pull to make the paint come out.
Single action versus double action
There are two types...single action brushes with simple trigger that you pull and double-action, which you push down and pull back to operate. The double-action airbrush give you more control over the paint job. As you push down and pull back farther, you get more pressure and more paint. If you push down a little and pull back a little, you get less paint.
As you can see, the double-action gives you more control, but it will probably take a little more time for you to get used to the "push and pull back" operation. However, when you do, you're work will improve because controlling where the paint goes is what airbrushing is all about.
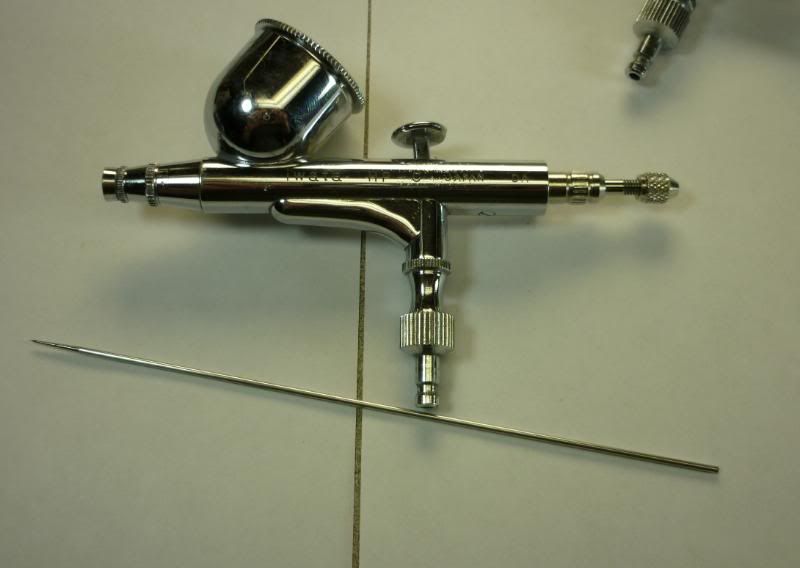
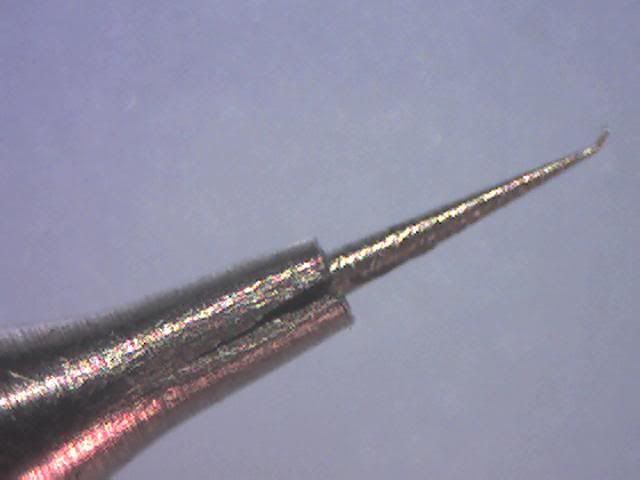
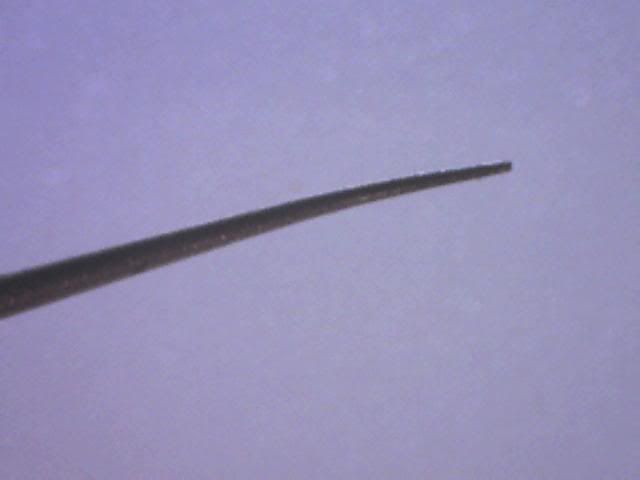
What size "needle?"
Airbrushes come with different size needles in them. The needle is pulled back out of the way, when you operate the trigger and the paint is allowed to flow out and onto the target.
A bigger needle (like "5 mm" allows more paint to be pushed out and it also allows you to spray thicker paints, such as pearls. A smaller needle (like 2 mm or 3mm) allows you to have more control because it sprays the paint out more sparingly.
Which one is "best?" Actually, its nice to have both, but if I could pick only one to start with, I'd probably buy the 5 mm. That will help you get the feel of things and later you can buy a brush that uses a smaller needle to allow you to paint finer details.
Three popular brands of airbrush:
Iwata
Badger
Paasche
Iwata is the most popular, but also the most expensive. It is a quality airbrush that will hold some of its value if you ever decide to sell it. It has great parts availability and offers a range of prices and models to choose from
Badger and Paasche are very popular also, but more affordable overall. I know a lot of guys who do outstanding work with those airbrushes.
More to follow...
Airbrushing is a way of painting with a spray pattern similar to what you've probably experienced with a can of "spray paint." The airbrush does the same thing, but it affords you a lot more control over where the paint goes and how much of it goes there...and that is all the difference in the world when it comes to how your project will look when complete.
The basics you'll need:
- airbrush
- compressor
- regulator for the compressor (to control the air pressure)
- paints
Lets start with the airbrush itself since this is what a lot of guys are most curious about and what a lot of questions focus upon.
An airbrush is either "gravity fed" or "siphon fed."
Gravity fed airbrushes usually have a cup on top in for the paint. The paint simply flows down through the cup into the airbrush and is blown onto the target surface.
Siphon fed airbrushes have a container which attaches to the bottom of the airbrush and the paint is pulled or "siphoned" out of the container and UP into the airbrush.
Generally siphon fed airbrushes require a little more airpressure because the paint is pulled up instead of being fed downward by gravity. For that reason, many users prefer gravity fed brushes. But siphon fed airbrushes do have their advantages. Some users like the idea that a bottle with paint attaches to the bottom of the brush and when you're ready to change colors, you simply remove the bottle, blow some solvent through the brush, and simply attach another bottle with the new color to the bottom of the airbrush. I prefer the gravity fed, but I've used both. I actually started with a siphon-fed Paasche airbrush.
Go ahead. Pull the trigger.
If you've look at airbrushes, you've noticed they have a trigger on top that you pull to make the paint come out.
Single action versus double action
There are two types...single action brushes with simple trigger that you pull and double-action, which you push down and pull back to operate. The double-action airbrush give you more control over the paint job. As you push down and pull back farther, you get more pressure and more paint. If you push down a little and pull back a little, you get less paint.
As you can see, the double-action gives you more control, but it will probably take a little more time for you to get used to the "push and pull back" operation. However, when you do, you're work will improve because controlling where the paint goes is what airbrushing is all about.
What size "needle?"
Airbrushes come with different size needles in them. The needle is pulled back out of the way, when you operate the trigger and the paint is allowed to flow out and onto the target.
A bigger needle (like "5 mm" allows more paint to be pushed out and it also allows you to spray thicker paints, such as pearls. A smaller needle (like 2 mm or 3mm) allows you to have more control because it sprays the paint out more sparingly.
Which one is "best?" Actually, its nice to have both, but if I could pick only one to start with, I'd probably buy the 5 mm. That will help you get the feel of things and later you can buy a brush that uses a smaller needle to allow you to paint finer details.
Three popular brands of airbrush:
Iwata
Badger
Paasche
Iwata is the most popular, but also the most expensive. It is a quality airbrush that will hold some of its value if you ever decide to sell it. It has great parts availability and offers a range of prices and models to choose from
Badger and Paasche are very popular also, but more affordable overall. I know a lot of guys who do outstanding work with those airbrushes.
More to follow...