
Here's one of the ways to "through-wire"...it isn't the only way and it isn't my idea. I learned this on another website.
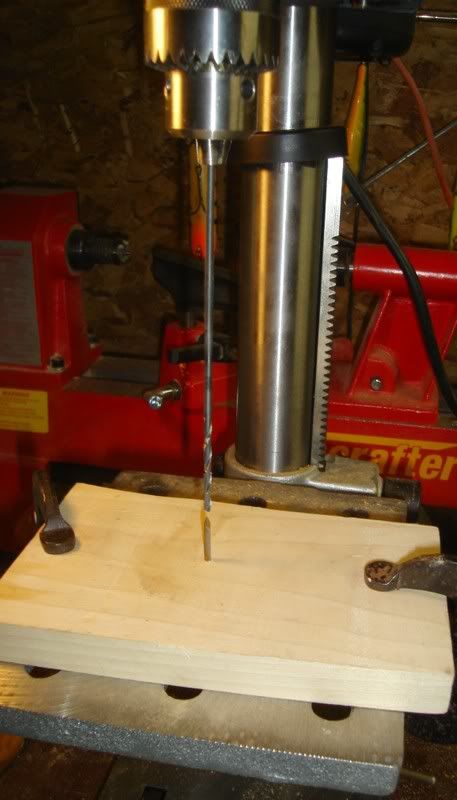
Start by clamping a board to the platform of your drill press. Drill a hole in the board and then place a nail in the board so that the point sticks up through the board.
Carefully place the board with the nail so that it lines up perfectly with the drill bit tip and clamp it down firmly like this:
![Image]()
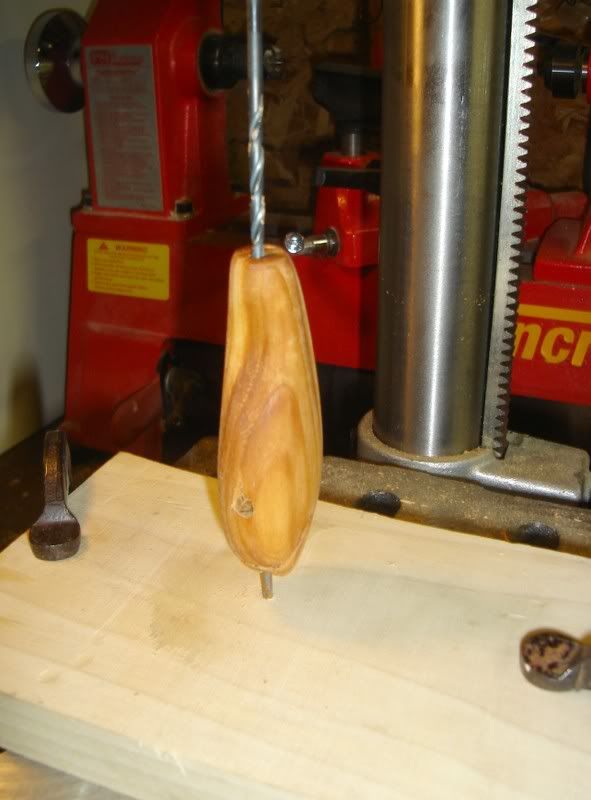
Take the bait and make small dents as pilot holes in the nose and the tail where you want the wire to run through the bait. Place the nose on the nail and align the drill bit in the pilot hole on the tail:
![Image]()
Drill just over halfway through the bait. Before you drill, make a mark on the drill bit so that you can tell how far you've drilled through.
![Image]()
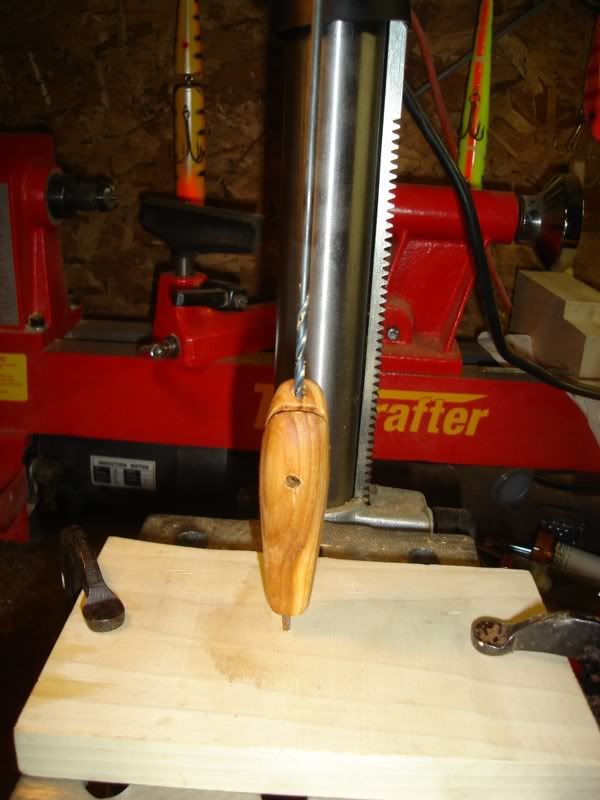
Now repeat the process with the tail on the nail...
![Image]()
Then drill a hole for the belly hook, making sure that it is drill only deep enough to hit the hole you've already drilled. This belly hole will have to be a bit bigger (use a slightly larger drill bit), because you'll have to be able to insert the wire with two twisted loops on it (see below). The twisting and the loops are a bit fatter than just the plain wire. Note the belly hole in the picture above...see how its a bit bigger to accommodate the belly wire?
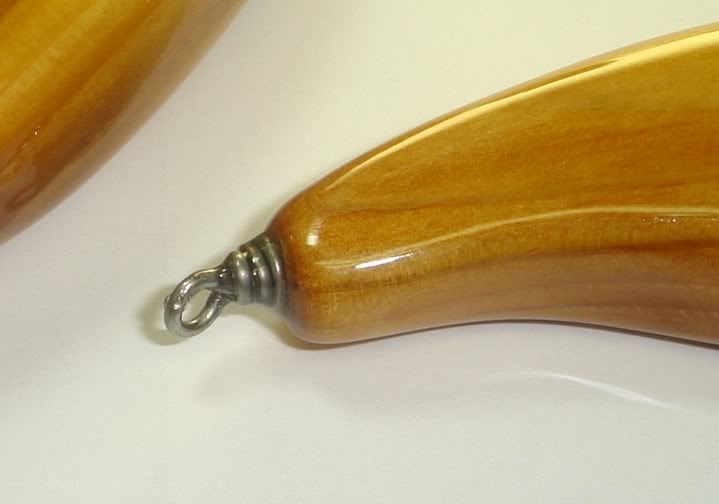
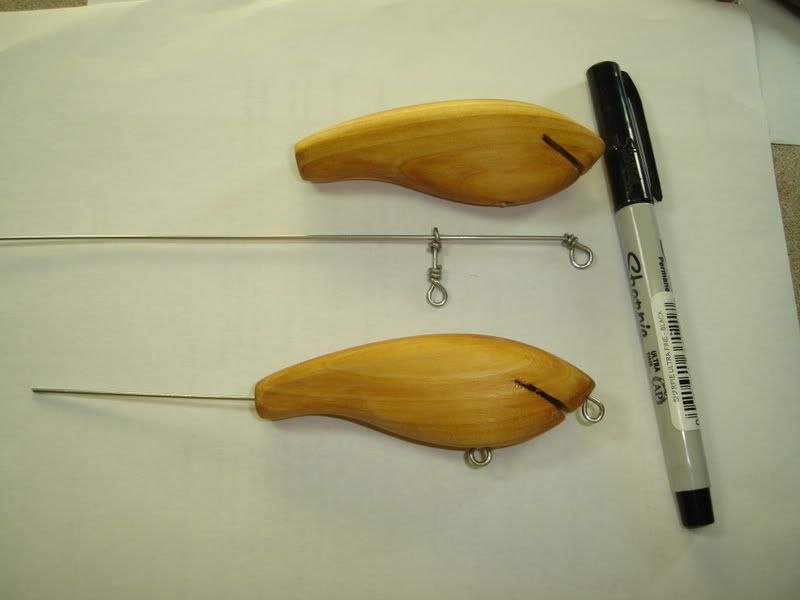
Here's how the installation is laid out when you're done:
![Image]()
Plunge some Devcon 2 ton epoxy in the holes and install the two pieces of wire. Be careful to keep the Devcon out of the lip slot. Just put a drop or two in the hole where the wire loop will be seated in the nose... put the rest of the epoxy in from the tail hole and the belly hole.
When the epoxy hardens (a minimum of four hours, be patient), you now clamp the nose line tie in a vice and make the twist for the tail hook. I'll post pictures that later... via an edit to this post.
This method works well for a bait that has the line tie on the nose (as opposed to having the line tie attached to the lip on a diving crank bait). By doing it this way you don't have to start by cutting the bait lengthwise to sandwich the wire between the two halves of the bait. I feel that by avoiding cutting the bait in half, you retain a bit more structural integrity. As I say, this works for the baits with a shorter lip and the line tie on the nose.
Note that the wire will actually run through the lip slot…not a big deal…just cut a slot in the lip to allow the lip to slide around the wire that is exposed in the lip slot.
As you can see, I have a 6 inch drill bit. These are available through a variety of places on the net. Grizzly carries them too. You can still do this with standard length drill bits as long as your bait isn't too long.
Any questions, just fire away.
Start by clamping a board to the platform of your drill press. Drill a hole in the board and then place a nail in the board so that the point sticks up through the board.
Carefully place the board with the nail so that it lines up perfectly with the drill bit tip and clamp it down firmly like this:
Take the bait and make small dents as pilot holes in the nose and the tail where you want the wire to run through the bait. Place the nose on the nail and align the drill bit in the pilot hole on the tail:
Drill just over halfway through the bait. Before you drill, make a mark on the drill bit so that you can tell how far you've drilled through.
Now repeat the process with the tail on the nail...
Then drill a hole for the belly hook, making sure that it is drill only deep enough to hit the hole you've already drilled. This belly hole will have to be a bit bigger (use a slightly larger drill bit), because you'll have to be able to insert the wire with two twisted loops on it (see below). The twisting and the loops are a bit fatter than just the plain wire. Note the belly hole in the picture above...see how its a bit bigger to accommodate the belly wire?
Here's how the installation is laid out when you're done:
Plunge some Devcon 2 ton epoxy in the holes and install the two pieces of wire. Be careful to keep the Devcon out of the lip slot. Just put a drop or two in the hole where the wire loop will be seated in the nose... put the rest of the epoxy in from the tail hole and the belly hole.
When the epoxy hardens (a minimum of four hours, be patient), you now clamp the nose line tie in a vice and make the twist for the tail hook. I'll post pictures that later... via an edit to this post.
This method works well for a bait that has the line tie on the nose (as opposed to having the line tie attached to the lip on a diving crank bait). By doing it this way you don't have to start by cutting the bait lengthwise to sandwich the wire between the two halves of the bait. I feel that by avoiding cutting the bait in half, you retain a bit more structural integrity. As I say, this works for the baits with a shorter lip and the line tie on the nose.
Note that the wire will actually run through the lip slot…not a big deal…just cut a slot in the lip to allow the lip to slide around the wire that is exposed in the lip slot.
As you can see, I have a 6 inch drill bit. These are available through a variety of places on the net. Grizzly carries them too. You can still do this with standard length drill bits as long as your bait isn't too long.
Any questions, just fire away.